准备工作 引言 本文的vue部分完全基于浏览器和CDN,即是说,无需nodejs环境。
本文并非教程。如果会点node,最好的教程自然是vuejs官方教程。
写本文的初衷是因为在学习vue的过程中,依靠node环境的话往往会陷入各种设置的汪洋之中,而依靠codepen之类的网站又往往有些隔靴搔痒的感觉——写的vue已经工作了,却仍然不知道到底是怎么回事。
所需工具
浏览器(如Chrome、Firefox等)
文本编辑器(如 vscode,notepad++, vim等等)
第三个例子开始需要web/http服务器
最好能学会用浏览器的devtools(偶尔交互运行javascript)及安装浏览器扩展 Vue.js devtools (用于查看Vue组件的结构)
几个极简例子 少于十行码的 vue 网页 用文本编辑器生成以下名为 vue-hello-world.html 的文件
1 2 3 4 5 6 7 8 9 <div id ="app" > {{ msg }}</div > <script src ="https://unpkg.com/vue/dist/vue.js" > </script > <script > new Vue({ el: "#app" , data: { msg: "hello from vue" } }); </script >
存盘后双击vue-hello-world.html,浏览器会显示hello from vue
改进版: 少于十行码的 vue 网页 修改vue-hello-world.html进一步分离html和js, 存为vue-hello-world1.html:
1 2 3 4 5 6 7 8 9 10 <div id ="app" > </div > <script src ="https://unpkg.com/vue/dist/vue.js" > </script > <script > new Vue({ el: "#app" , data: { msg: "hello from vue" }, template: "<div > {{ msg }} </div > " }); </script >
双击vue-hello-world1.html,浏览器显示hello from vue
分离成 html 和 js 文件 vue-hello.html:
1 2 <div id ="app" > </div > <script type ="module" src ="vue-hello.js" > </script >
vue-hello.js:
1
2
3
4
5
6
7
import Vue from "https://unpkg.com/vue/dist/vue.esm.browser.js" ;new Vue({ el: "#app" , data: { msg : "hello from vue" }, template: "<div>{{ msg }}</div>" });
由于cors问题,点击vue-hello.html不能显示结果。需要开一个http服务器,例如 python下
或node下用npm install http-server -g装一个http服务器后运行
在浏览器地址栏输入相应的端口和文件名,例如
1 http://127.0.0.1:8000/vue-hello.html
浏览器显示hello from vue
html及js文件样本前一个例子vue-hello.js里用了
1 import Vue from "https://unpkg.com/vue/dist/vue.esm.browser.js" ;
里面的vue.esm.browser.js看上去不太和谐。因此我们以后将使用如下的 html和js:在 html 文件里里导入vue.js。hello.html:
1 2 3 4 <div id ="app" > </div > <script src ="https://unpkg.com/vue/dist/vue.js" > </script > <script type ="module" src ="hello.js" > </script >
hello.js:
1
2
3
4
5
new Vue({ el: "#app" , data: { msg : "hello from vue" }, template: "<div>{{ msg }}</div>" });
启动http服务器(例如 python -m httml.server 或 http-server)。浏览器指向对应的端口及uri(例如 http://127.0.0.1:8000/hello.html )后显示 hello from vue
以后要用到第三方js库也会放在html文件里,另外需要用css框架(bootstrap, bulma, buefy, element等等)及图标库(Font Awesome,Material Design等)时也会放在html文件的头<head></head>里。
v-bind 和 v-model 绑定v-bind: 单向绑定binding.html:
1 2 3 4 <div id ="app" > </div > <script src ="https://unpkg.com/vue/dist/vue.js" > </script > <script type ="module" src ="binding.js" > </script >
binding.js:
1
2
3
4
5
6
7
8
9
10
11
const templ = ` <div> <input placeholder="edit me" v-bind:value="msg" /> <p>Message is: {{ msg }}</p> </div> ` new Vue({ el: "#app" , data: { msg : "hello from vue" }, template: templ });
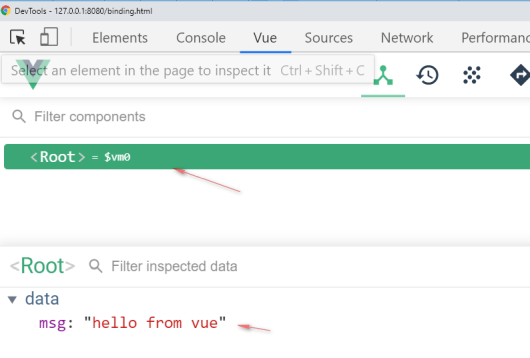
<input />的 value 绑定在vue实例data的msg的值(即hello from vue),而且是即时反应的,msg变化时,<input />的 value即时变化。可以打开devtools,点击Vue卡(需要先安装浏览器扩展 Vue.js devtools )里的Root
再在console终端卡里输入
1 $vm0 ._data.msg = 'hello again'
<input />的 value即时显示为hello again
v-model: 双向绑定而如果我们在<input />框里改变value,Message is: hello from vue却不会变化。要达到所谓的双向绑定(改变<input />的 value时vue实例的msg也跟着变化,就需要用到v-model。editme.html:
1 2 3 4 <div id ="app" > </div > <script src ="https://unpkg.com/vue/dist/vue.js" > </script > <script type ="module" src ="editme.js" > </script >
editme.js:
1
2
3
4
5
6
7
8
9
10
11
const templ = ` <div> <input placeholder="edit me" v-model="msg" /> <p>Message is: {{ msg }}</p> </div> ` new Vue({ el: "#app" , data: { msg : "" }, template: templ });
v-on 和 methodclick-say-hello.html:
1 2 3 4 <div id ="app" > </div > <script src ="https://unpkg.com/vue/dist/vue.js" > </script > <script type ="module" src ="click-say-hello.js" > </script >
click-say-hello.js:
1
2
3
4
5
6
7
8
9
10
11
12
13
14
15
16
17
18
19
new Vue({ el: "#app" , data() { return { msg: "" }; }, methods: { hello: function (evt ) this .msg = "hellooo..." ; } }, template: ` <div> <button v-on:click="hello">Say it</button> <p>Saying: {{ msg }}</p> </div> ` });
浏览器指向http://127.0.0.1:8080/click-say-hello.html, 点击Say it 后浏览器显示:
components: Vue.component简单Component compo1.html:
1 2 3 4 <div id ="app" > </div > <script src ="https://unpkg.com/vue/dist/vue.js" > </script > <script type ="module" src ="compo1.js" > </script >
compo1.js:
1
2
3
4
5
6
7
8
9
10
11
12
13
14
15
16
17
18
19
20
21
22
const CompoOne = Vue.component("compo-one" , { data: function ( return { compoMsg : "hello from compo-one" }; }, template: "<div>message from compo-one: {{ compoMsg }} </div>" }); const templ = ` <div> compo-one in #app: <compo-one></compo-one> </div> ` ;new Vue({ el: "#app" , data() { return { msg: "" }; }, components: { CompoOne }, template: templ });
浏览器指向 http://127.0.0.1:8080/compo1.html显示
1
2
compo-one in #app: message from compo-one: hello from compo-one
SFC: Single File Component将 compo1.js 里的 CompoOne 分离出来成为单独一个文件就成了所谓的 Single File Component 组件。
app1.html:
1 2 3 4 <div id ="app" > </div > <script src ="https://unpkg.com/vue/dist/vue.js" > </script > <script type ="module" src ="app1.js" > </script >
app1.js:
1
2
3
4
5
6
7
8
9
10
11
12
13
14
15
16
17
import CompoOne from "./CompoOne.js" ;const templ = ` <div> compo-one in #app: <compo-one></compo-one> </div> ` ;new Vue({ el: "#app" , data() { return { msg: "" }; }, components: { CompoOne }, template: templ });
CompoOne.js:
1
2
3
4
5
6
export default { data: function ( return { compoMsg : "hello from compo-one" }; }, template: "<div>message from compo-one: {{ compoMsg }} </div>" };
浏览器指向 http://127.0.0.1:8080/app1.html, 显示和上一个例子的输出相同
1
2
compo-one in #app: message from compo-one: hello from compo-one
题外话:CompoOne.js 转 CompoOne.vue 只需将 CompoOne.js 里的 template部分分离出来放在<template></template>里,再在其余部分加上 <script></script>,就可以转换成nodejs环境下用的组件。
CompoOne.vue:
1
2
3
4
5
6
7
8
9
10
<template> <div>message from compo-one: {{ compoMsg }}</div> </template> <script> export default { data: function() { return { compoMsg: "hello from compo-one" }; } }; </script>
例如,在 nodejs 环境下运行:
浏览器指向对应的端口(例如 http://localhost:8081/)显示message from compo-one: hello from compo-one。
props 组件传参组件的意义在于可以传入不同的参数多次使用,props就是用来传参的。
传固定参数 app2.html:
1 2 3 4 <div id ="app" > </div > <script src ="https://unpkg.com/vue/dist/vue.js" > </script > <script type ="module" src ="app2.js" > </script >
app2.js:
1
2
3
4
5
6
7
8
9
10
11
12
13
14
15
16
17
18
19
import CompoTwo from "./CompoTwo.js" ;const templ = ` <div> compo-two name="Alice": <compo-two name="Bob"></compo-two> <br/> compo-two: name="Bob" <compo-two name="Alice"></compo-two> </div> ` ;new Vue({ el: "#app" , data() { return { msg: "" }; }, components: { CompoTwo }, template: templ });
CompoTwo.js:
1
2
3
4
5
6
7
export default { data: function ( return { compoMsg : "hey " + this .name + " hello from compo-two" }; }, props: ['name' ], template: "<div>message from compo-two: {{ compoMsg }} to {{ name }} </div>" };
浏览器指向 http://127.0.0.1:8080/app2.html, 显示
1
2
3
4
5
compo-two name="Alice": message from compo-two: hey Bob hello from compo-two to Bob compo-two: name="Bob" message from compo-two: hey Alice hello from compo-two to Alice
父组件传参 利用 v-bind 可以传入父组件的数据,从而可以获取用户的输入。
app3.html:
1 2 3 4 <div id ="app" > </div > <script src ="https://unpkg.com/vue/dist/vue.js" > </script > <script type ="module" src ="app3.js" > </script >
app3.js:
1
2
3
4
5
6
7
8
9
10
11
12
13
14
15
16
17
18
19
import CompoThree from "./CompoThree.js" ;const templ = ` <div> <input placeholder="Type your name" v-model="msg" /> <br/> <compo-three v-bind:name="msg"></compo-three> </div> ` ;new Vue({ el: "#app" , data() { return { msg: "" }; }, components: { CompoThree }, template: templ });
CompoThree.js:
1
2
3
4
export default { props: ['name' ], template: "<div>Hello {{ name }}! </div>" };
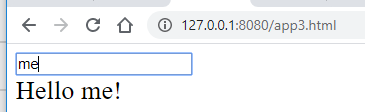
浏览器指向 http://127.0.0.1:8080/app3.html,在框里输入 me, 浏览器显示
computed 和 watch前面的组件是在 template 里调用 props。如想在组件的data里调用则要利用 vue 的 computed 或 watch。例如,下面的做法并不能获取props的当前值。
app-foura.html:
1 2 3 4 <div id ="app" > </div > <script src ="https://unpkg.com/vue/dist/vue.js" > </script > <script type ="module" src ="app4a.js" > </script >
app-foura.js:
1
2
3
4
5
6
7
8
9
10
11
12
13
14
15
16
17
18
19
import CompoFoura from "./CompoFoura.js" ;const templ = ` <div> <input placeholder="Type your name" v-model="msg" /> <br/> <compo-foura v-bind:name="msg"></compo-foura> </div> ` ;new Vue({ el: "#app" , data() { return { msg: "" }; }, components: { CompoFoura }, template: templ });
CompoFoura.js:
1
2
3
4
5
6
7
export default { data: function ( return { compoMsg : this .name }; }, props: ["name" ], template: "<div>Hello {{ compoMsg }}! </div>" };
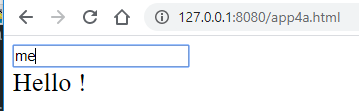
浏览器指向 http://127.0.0.1:8080/app4a.html, 但用户输入时,compoMsg并无变化:me 时,浏览器只显示 Hello!,不显示 Hello me!。
组件 props 的使用 app-four.html:
1 2 3 4 <div id ="app" > </div > <script src ="https://unpkg.com/vue/dist/vue.js" > </script > <script type ="module" src ="app4.js" > </script >
app-four.js:
1
2
3
4
5
6
7
8
9
10
11
12
13
14
15
16
17
18
19
import CompoFour from "./CompoFour.js" ;const templ = ` <div> <input placeholder="Type your name" v-model="msg" /> <br/> <compo-four v-bind:name="msg"></compo-four> </div> ` ;new Vue({ el: "#app" , data() { return { msg: "" }; }, components: { CompoFour }, template: templ });
CompoFour.js:
1
2
3
4
5
6
7
8
9
10
11
12
13
14
15
16
17
export default { data: function ( return { compoMsg : this .name }; }, props: ["name" ], watch: { name: function (newQuery, oldQuery ) this .compoMsg = newQuery } }, computed: { phraseFromParen: function ( return this .name; } }, template: "<div>Hello {{ compoMsg }}/{{ phraseFromParen }}! </div>" };
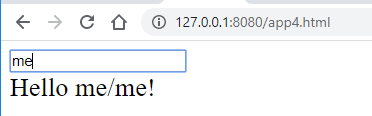
浏览器指向 http://127.0.0.1:8080/app4.html, 用户输入 me 时,compoMsg 和 phraseFromParen 随着变化(显示Hello me/me!):
组件实用 + v-html:基于 axios 的中英同义词接口 到这里已经可以写个小小的实用网页了,尽管界面简陋(有时间后面会用buefy框架整个漂亮一点的界面)。下面用到的接口是个利用爬虫给出中英同义词的接口。组件CompoAxiosGet.js 的 template 里用了 v-html。
axios-get.html:
1 2 3 4 <div id ="app" > </div > <script src ="https://unpkg.com/vue/dist/vue.js" > </script > <script src ="https://unpkg.com/axios/dist/axios.js" > </script > <script type ="module" src ="axios-get.js" > </script >
axios-get.js:
1
2
3
4
5
6
7
8
9
10
11
12
13
14
15
16
17
18
19
import CompoAxiosGet from "./CompoAxiosGet.js" ;const templ = ` <div> <input placeholder="Type a phrase" v-model="query" /> <br/> <compo-axios-get v-bind:phrase="query"></compo-axios-get> </div> ` ;new Vue({ el: "#app" , data() { return { query: "" }; }, components: { CompoAxiosGet }, template: templ });
CompoAxiosGet.js:
1
2
3
4
5
6
7
8
9
10
11
12
13
14
15
16
17
18
19
20
21
22
23
24
25
26
27
28
29
30
31
32
33
34
35
36
37
38
39
40
41
42
43
44
45
46
const inst = axios.create({ baseURL: "http://173.82.240.230:1337/173.82.240.230" , timeout: 3000 , headers: { UserAgent: "Mozilla/5.0 (Macintosh; Intel Mac OS X 10_8_2) AppleWebKit/537.17 (KHTML, like Gecko) Chrome/24.0.1309.0 Safari/537.17" } }); export default { data: function ( return { result : this .phrase }; }, props: ["phrase" ], watch: { phrase: function (newVal, oldVal ) if (newVal == "" ) return "" ; let serviceCode = "abc" ; let query = newVal; let params = new URLSearchParams(); params.append("query" , query); inst .post(`/${serviceCode} ` , params) .then(resp => this .result = resp.data; }) .catch(err => this .result = err.response; }); } }, computed: { resultAlt: function ( return this .phrase + (this .phrase ? ":" : "" ); } }, template: ` <div> {{ resultAlt }} <br/> {{ result }} <div v-html="result"></div> </div> ` };
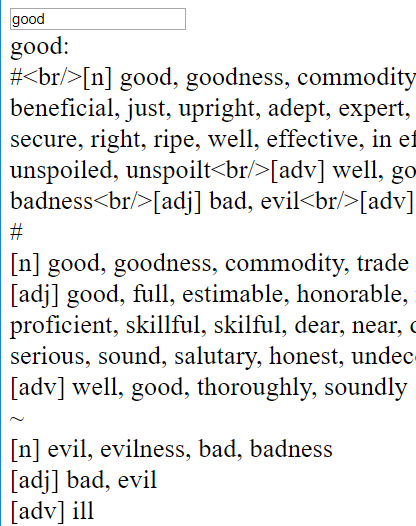
浏览器指向 http://127.0.0.1:8080/axios-get.html, 用户输入 good ,浏览器显示good的同义词和反义词。
整合 UI 框架Buefy UI框架也可以整合进去。同时 html 文件也整得规范了一点。
buefy-search.html:
1
2
3
4
5
6
7
8
9
10
11
12
13
14
15
16
17
18
19
<!DOCTYPE html > <html > <head > <meta charset ="utf-8" /> <meta name ="viewport" content ="width=device-width, initial-scale=1" /> <link rel ="stylesheet" href ="https://unpkg.com/buefy/dist/buefy.min.css" /> <link rel ="stylesheet" href ="https://cdn.materialdesignicons.com/2.5.94/css/materialdesignicons.min.css" /> </head > <body > <div id ="app" > </div > <script src ="https://unpkg.com/vue/dist/vue.js" > </script > <script src ="https://unpkg.com/buefy/dist/buefy.min.js" > </script > <script src ="https://unpkg.com/axios/dist/axios.js" > </script > <script type ="module" src ="buefy-search.js" > </script > </body > </html >
buefy-search.js:
1
2
3
4
5
6
7
8
9
10
11
12
13
14
15
16
17
18
19
20
21
22
23
24
25
26
27
28
29
30
31
32
33
34
35
36
37
38
39
import BuefySearchCompo from "./buefy-search-compo.js" ;const templ = ` <div> <!--input placeholder="Type a phrase" v-model="query" /--> <section class="is-medium"> <div class="container"> <!--h3 class="subtitle">With Material Design Icons</h3--> <b-field> <b-input placeholder="Search..." type="search" icon="magnify" icon-clickable v-model="query" @icon-click="searchIconClick"> </b-input> </b-field> <div class="card is-info has-text-primary is-family-primary has-text-weight-medium is-medium"> <buefy-search-compo v-bind:phrase="query"></buefy-search-compo> </div> </div> </section> </div> ` ;new Vue({ el: "#app" , data() { return { query: "" }; }, components: { BuefySearchCompo }, template: templ, methods: { searchIconClick() { alert("搜索栏输入中文或英文" ); } } });
buefy-search-compo.js:
1
2
3
4
5
6
7
8
9
10
11
12
13
14
15
16
17
18
19
20
21
22
23
24
25
26
27
28
29
30
31
32
33
34
35
36
37
38
39
40
41
42
43
44
45
46
47
48
const inst = axios.create({ baseURL: "http://173.82.240.230:1337/173.82.240.230" , timeout: 3000 , headers: { UserAgent: "Mozilla/5.0 (Macintosh; Intel Mac OS X 10_8_2) AppleWebKit/537.17 (KHTML, like Gecko) Chrome/24.0.1309.0 Safari/537.17" } }); export default { data: function ( return { result : this .phrase }; }, props: ["phrase" ], watch: { phrase: function (newVal, oldVal ) if (newVal == "" ) return "" ; this .result = "diggin..." ; let serviceCode = "abc" ; let query = newVal; let params = new URLSearchParams(); params.append("query" , query); inst .post(`/${serviceCode} ` , params) .then(resp => this .result = resp.data; }) .catch(err => this .result = err.response; }); } }, computed: { resultAlt: function ( return this .phrase + (this .phrase ? ":" : "" ); } }, template: ` <div> <!--{{ phrase }}- --> {{ resultAlt }} <br/> {{ result == "diggin..." ? "": result }} <div v-html="result"></div> </div> ` };
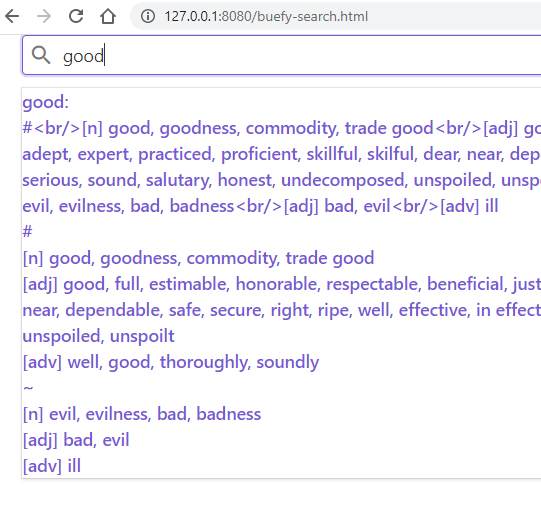
浏览器指向 http://127.0.0.1:8080/buefy-search.html, 用户输入 good ,浏览器显示 good 的同义词和反义词。
结语 算是自己的笔记,希望对想学习 vue 的网友有点用。有时间可能再把界面做得复杂点。